1. Bookkeeping
1.1 Add Records
After entering the app, tap the “+ Expense/Income” button at the bottom. In the pop-up window, fill in the relevant information and tap “Add” in the upper right corner. You can enter the following information:
| Amount | Enter the amount of income or expense. You can enter +, -, and * for simple calculations. | After entering the amount, tap the  on the right to search the most recent 5 records with the same amount and fill in their information. on the right to search the most recent 5 records with the same amount and fill in their information. |
| Merchant | Enter the merchant involved in the income or expense record. | Tap the  button on the right of Merchant to show a list of merchants previously recorded under the same subcategory. button on the right of Merchant to show a list of merchants previously recorded under the same subcategory. |
| Category | Set the record’s category. The system organizes bookkeeping data into three levels: Category -> Subcategory -> Record. Tap the category information to select, add, or delete categories and subcategories on the pop-up page. | 1. After adding a category, you also need to add subcategories within it. Categories are used only for grouping subcategories, which are used to group income and expense records. 2. When adding a subcategory, you need to choose either “Income” or “Expense”. When adding an expense record, you can only choose expense subcategories (income subcategories and categories that do not contain income subcategories are hidden). The same applies when adding income records. 3. When using the app for the first time, you can tap “Import built-in category list” at the bottom of the pop-up page to choose and add categories and subcategories that suit you. Later, you can tap the  menu in the upper right corner, go to “Category Management”, then open the menu and choose “Import”. menu in the upper right corner, go to “Category Management”, then open the menu and choose “Import”.4. Long press a category or subcategory name, and in the pop-up menu you can choose “Edit” or “Delete” the category or subcategory. Note that after deletion, the subcategories and records under it will also be deleted. |
| Labels | Set labels for the record, such as expenses from a trip or expenses for an event. Tap the plus sign to the right of Labels and choose the labels to add in the pop-up page. Tap an added label to remove it from the current record. | In the pop-up page, long press a label name, and in the pop-up menu you can choose “Edit” or “Delete” the label. Note that after deletion, the records under it will also be deleted. |
| Payment Method | When a record uses a currency different from the default currency, you need to add a payment method for that currency and set it in the record. Tap Payment Method to select, add, or delete a payment method in the pop-up page. | In the pop-up page, long press a payment method name, and in the pop-up menu you can choose “Edit” or “Delete” the payment method. Note that after deletion, the records under it will also be deleted. In the Edit Payment Method window, turn on “Balance” to set the current balance of the payment method at the current point in time. After that, each time you add or delete a record using this payment method, the balance will be updated. Tap the menu in the upper right corner, go to “Payment Method Management”, then open the menu and tap “Update”. This will adjust all payment methods with balance enabled. |
| Date | Enter the date when the income or expense record occurred. Tap the date to choose the time. | You can switch between “calendar” and “time” modes. |
| Details | Tap the “Details” page at the top of the Add Record dialog and enter the detailed information for the record. | You can tap “Voice input” below and speak the information; the system will convert speech to text and fill it in. You can enter keywords in the text box, then tap “Search past” below to search the most recent 5 records containing those keywords and fill in their amount, category, and details information. After entering details, tap “Extract information” below; the system will analyze the details and extract amount and category information from it. |
Note:
- You can also go to the “Category Management”, “Label Management”, and “Payment Method Management” pages to add or delete items (tap the in the upper right corner) and view summaries of data under different categories, labels, and payment methods.
- Only amount and category are required. Other information is optional.
1.2 Record Images
Tap the “Image” page at the top of the Add Record dialog. If you have images related to the record, such as a photo of a receipt or invoice, tap “Take Photo” or “Photo Library” at the bottom of the page. You can also drag and drop images from other apps here or onto the “+ Expense/Income” button directly.
Swipe your finger across the image to show a square with a green border. Tap “Cut” at the bottom to crop and enlarge the image inside the square.
Tap “Analysis” and the system will recognize information such as amount, date, and merchant from the image inside the green border (or the entire image if nothing is selected), prompt the user to choose what to fill in, and automatically recommend three categories for selection.
Note:
1. Merchant information must have appeared in previous records and also appear in the image text to be recognized automatically.
2. It is recommended to select the relevant area in the image before analysis to improve accuracy.
3. When adding more than one image, the system will prompt “Merge with existing image?”. Choosing “Yes” will stitch the new image below the old one.
4. You can share images from other apps into this app; see the demo video for reference.
2. Browse and Search Records
- Tap the in the upper right corner and choose “Record” to view all records
- Tap , go to the “Category Management” page, and choose a subcategory to view all records under that subcategory
- Tap , go to “Label Management” or “Payment Management”, and choose a label or payment method to view related records
- Tap , go to “Chart”, select “Total income” or “Total expense”, and keep selecting any linked item until the final page displays the matching records.
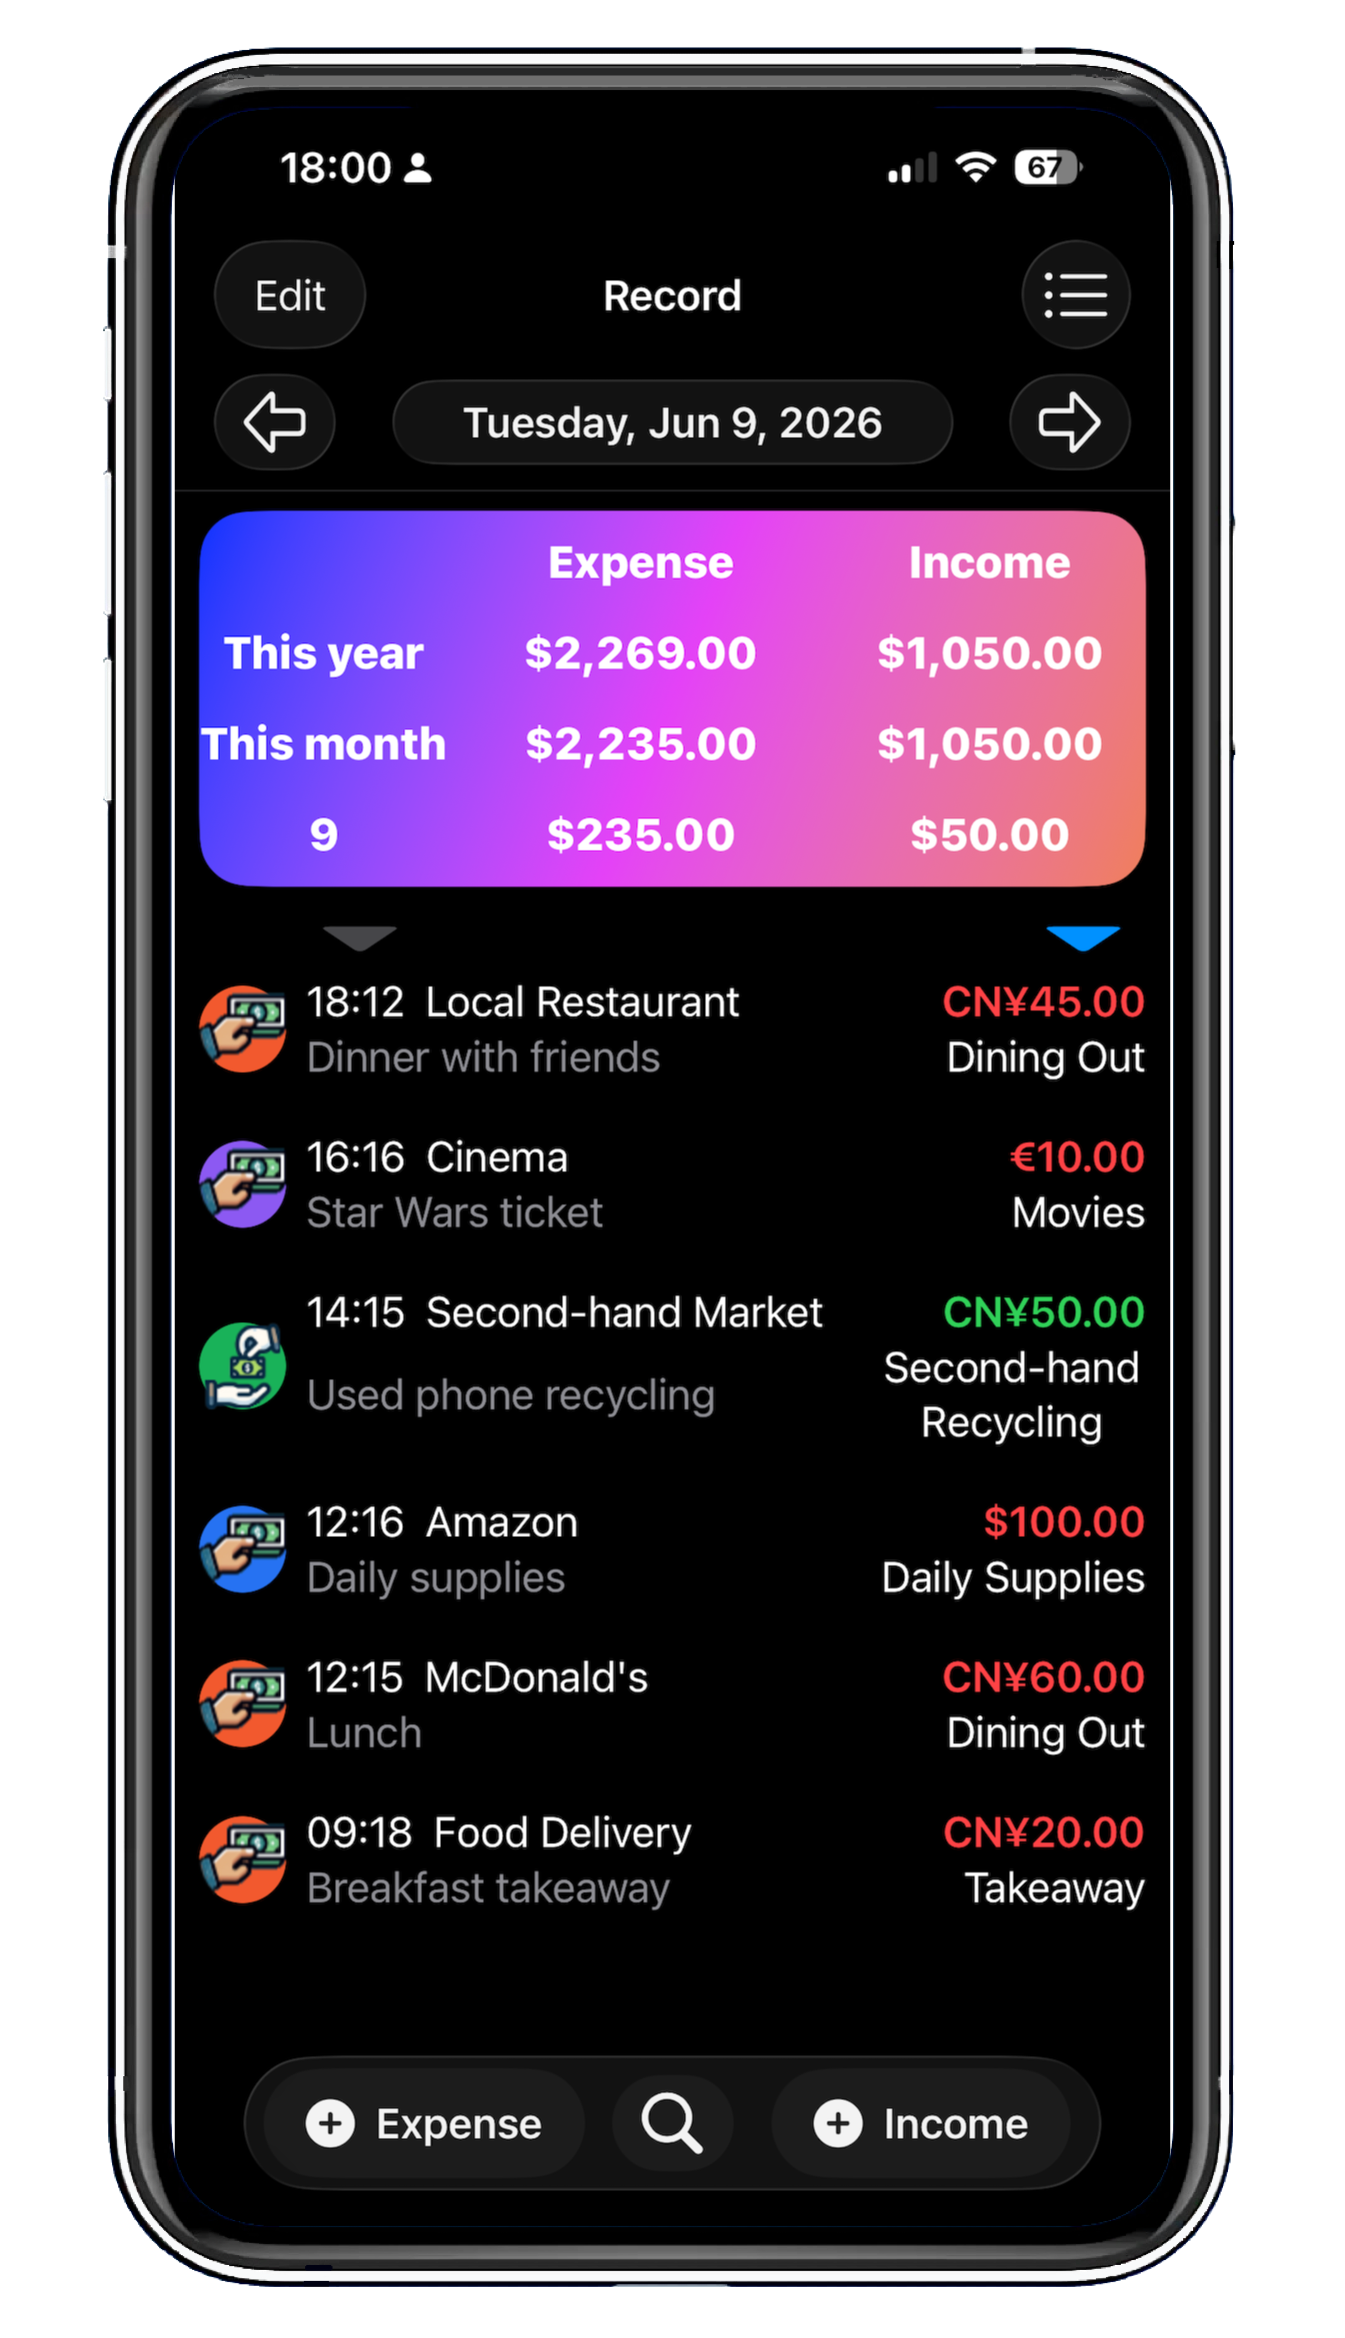
- For 1 and 2, the top of the page shows the total income and total expense for the current month and year. You can tap the date at the top to choose different dates for summarization:
- Records for the entire year (only applicable to 2)
- Records for the entire month
- Records for a specific day
- Tap a record to display more information. Tap an image in the record to view it full screen and zoom in or out with gestures.
- Long press a record, and in the pop-up menu you can choose “Edit” or “Delete” the record.
- You can batch delete, mark (see section 5: Label Management), or move records to another subcategory. To do this, tap “Edit” in the upper left corner. After selecting the records to move, tap the corresponding button below. When finished, tap “Done” in the same place to exit editing mode.
- You can tap the downward triangle above a record to sort records by amount or time
- Tap the at the bottom to enter the search page. You can search for records whose details or merchant information contain specific keywords. Only relevant records will be shown (for 2, records under the selected category; for 3, records under the selected label or payment method). The edit and sort buttons in 8 and 9 are also available.
3. Charts
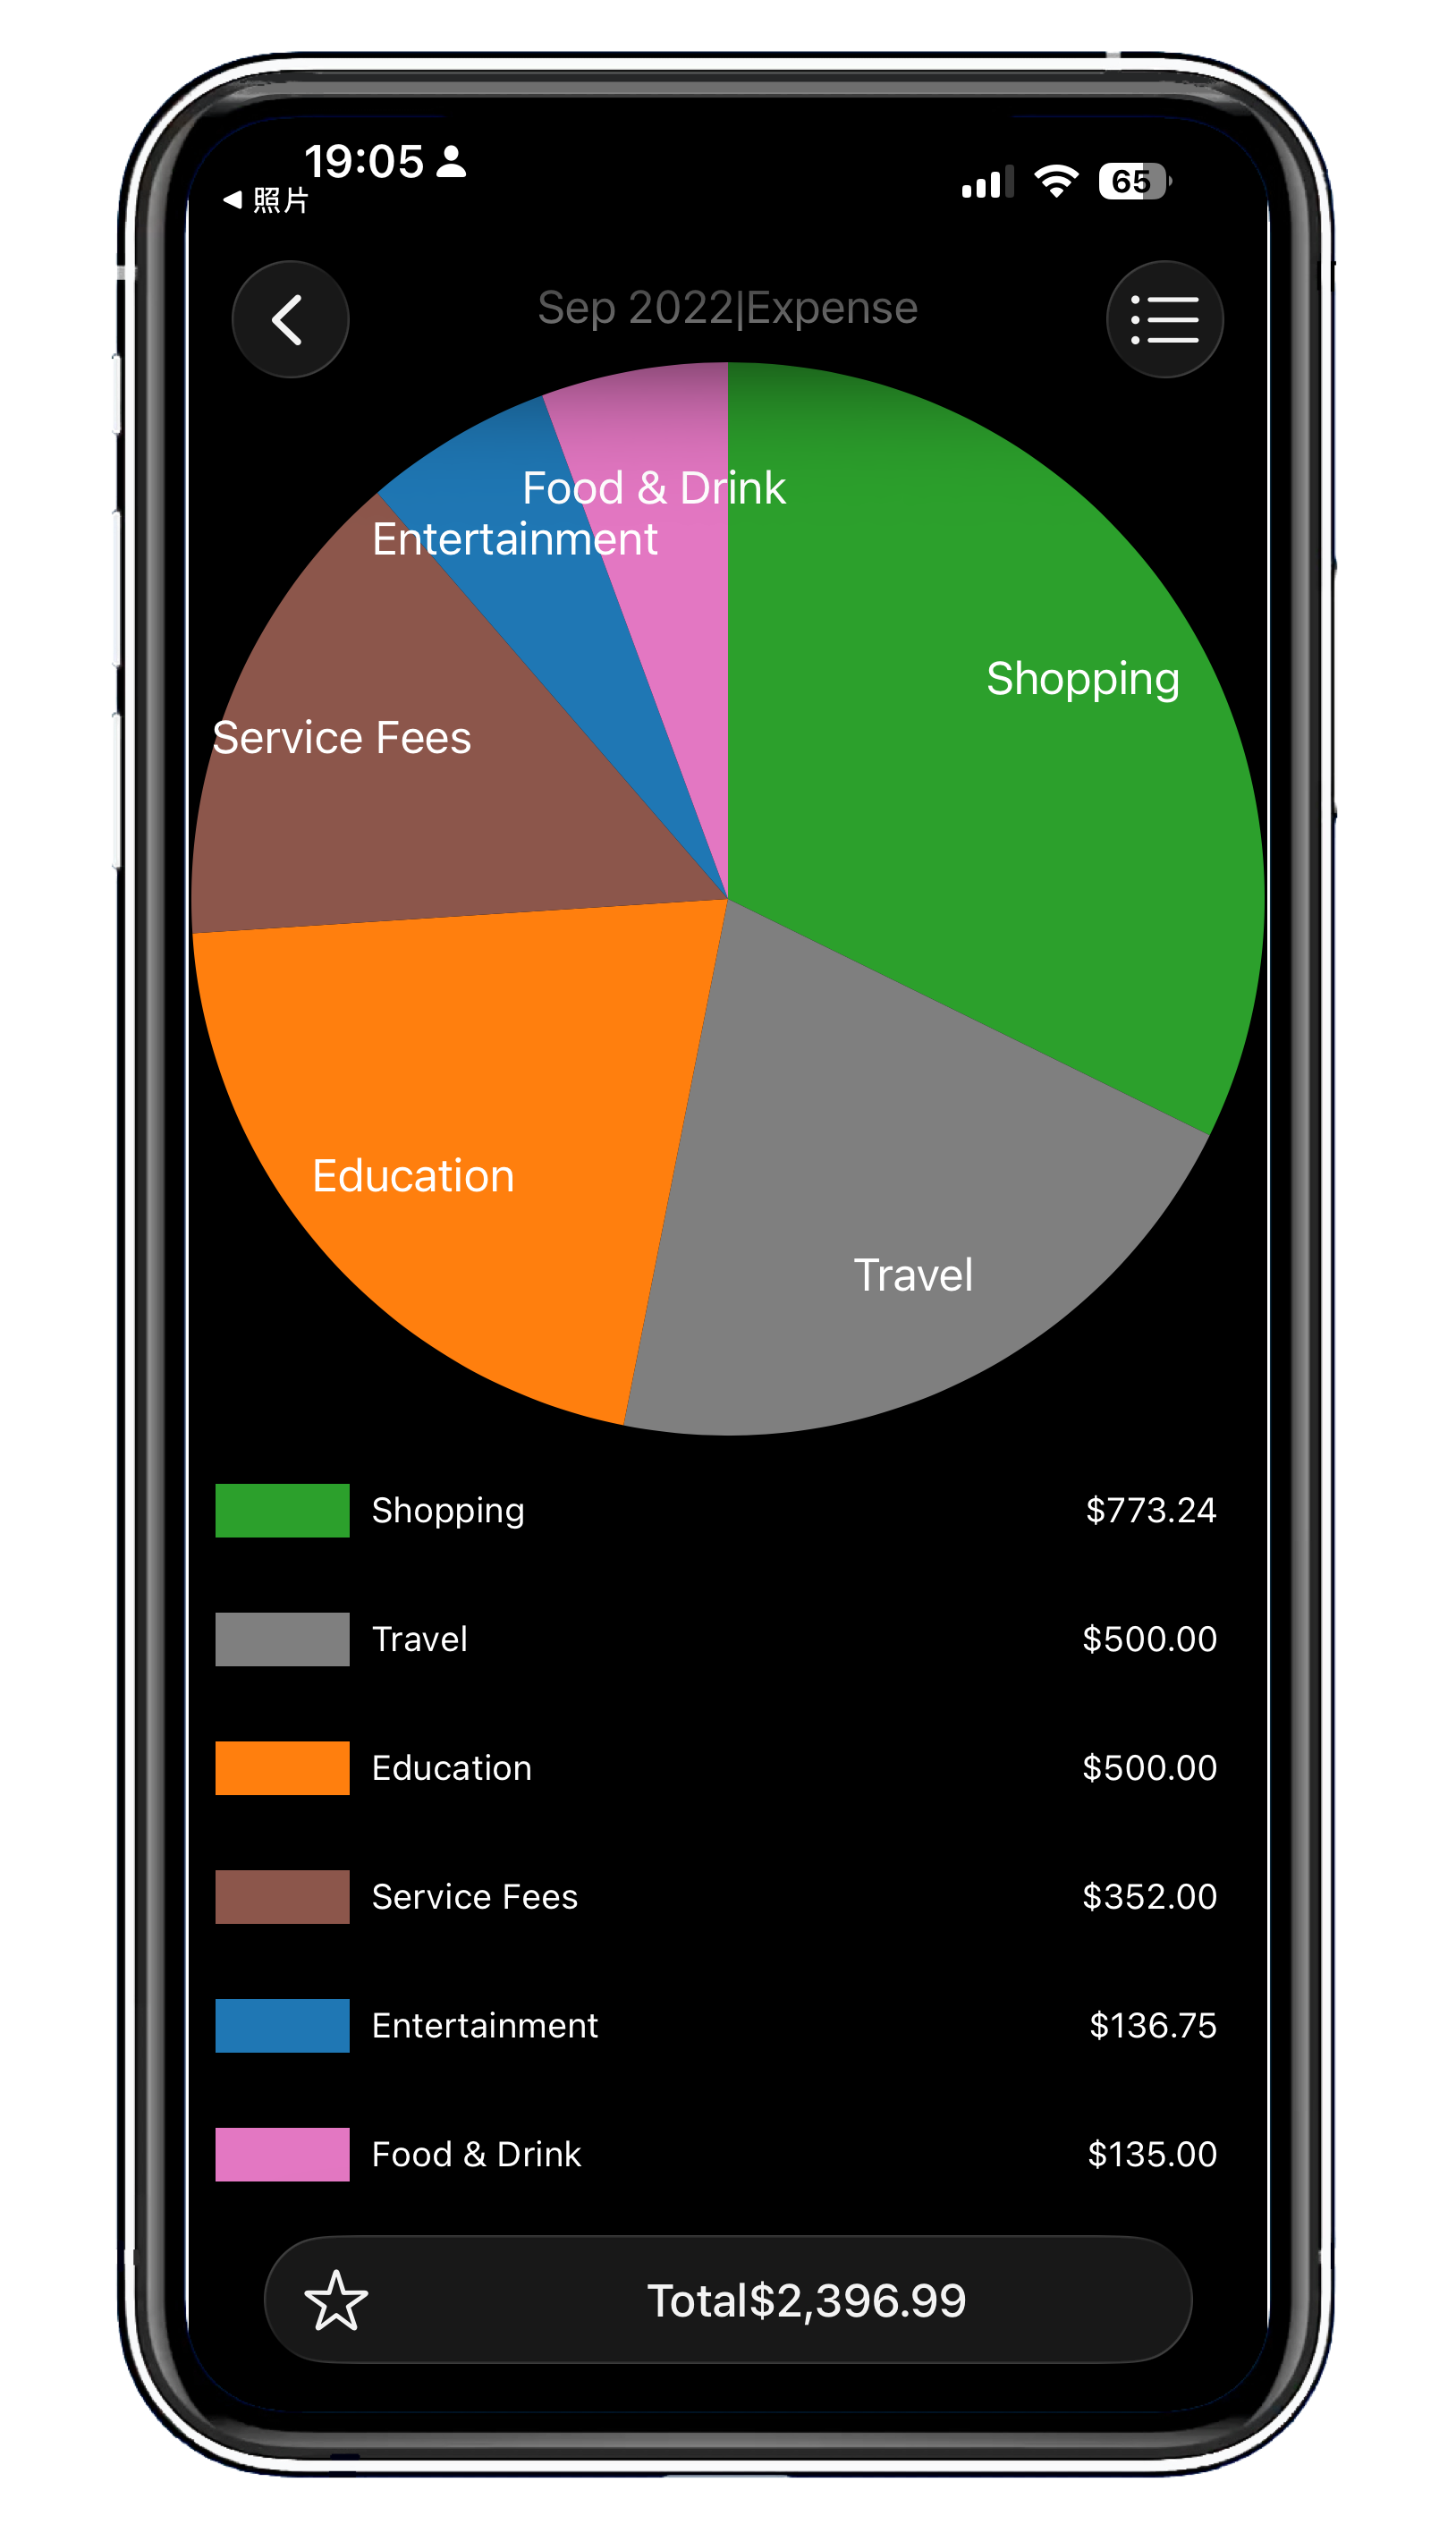
On the “Chart” home page, tap Total income or Total expense to enter the “Chart” summary page. Here you can use charts to summarize and count records by different fields. For example, annual summaries can be broken down into monthly summaries, and so on. Tap “Edit” next to “Summarization method and order” on the “Chart” home page to change it.
After entering a summary page, tap the “Home” item in the menu in the upper right corner to return to the home page, or tap “Pie chart” or “Bar chart” in the menu to change the chart type.
Tap the  in the upper right corner to add the current page to Quick Access. After that, when you return to the home page, you can see the added Quick Access pages and tap one to open the relevant page directly. Tap
  again to remove the Quick Access item.
If the current page path contains year-month-day, year-month, or only year fields, and the date matches the current time, adding it to Quick Access will prompt “Do you want to always keep the date on the access path up to date?” If you choose Yes, the date in the added Quick Access path will always stay current. For example, if the current date is a day in July 2021 and you add a summary of shopping expenses for July 2021 to Quick Access, it will be shown as this month’s shopping expenses. When August comes, tapping the Quick Access link will automatically open the August shopping expense summary.
4. Settings
Tap the in the upper right corner to enter the “Settings” page. You will see the following buttons and features:
| Auto Sync | Data will automatically sync to other devices through iCloud (you must be signed in to the same iCloud account). This feature cannot be turned off. | |
| Authenticate | When enabled, Face ID, Touch ID, or password verification will be used each time you enter the app. | |
| Export to File | Export category and record data to a CSV file. Note: image data in records will not be exported. See the last section of this article for the file format. | |
| Import from File | Import category and record data from a CSV file. During import, locally existing records in the CSV file will be ignored. See the last section of this article for the file format. |
5. Template Management
Tap the in the upper right corner to enter the “Template Management” page, where you can add monthly automatic records (for example, an iCloud service fee of X yuan on the 31st of every month). If the current month does not have that date, the automatic record will be created on the last day of the month instead (for example, if February does not have the 31st, it will be created on the last day, the 28th or 29th).
6. Questions and Feedback
Tap the in the upper right corner to enter the “Feedback” page. If you encounter any problems while using the app or have any suggestions, you can send feedback here. If notifications for the app are not enabled, after entering “Questions” you will be prompted to tap “Confirm” to open settings so that you can receive problem reply notifications in time.
7. Import/Export File Format
Each line in the import/export CSV file contains data for a category, subcategory, label, or record, with fields separated by commas. If a field contains commas or line breaks, use \, (full-width comma) and \n to represent them.
Categories contain the following fields:
- 0
- Category ID, any string that uniquely identifies the category
- Category name
Subcategories contain the following fields:
- 1
- Subcategory ID, any string that uniquely identifies the category
- Subcategory name
- Parent category ID
- true — income subcategory, false — expense subcategory
Records contain the following fields:
- 2
- Record ID, any string that uniquely identifies the record
- Parent subcategory ID
- Record date (year-month-day hour:minute), such as 2022-01-12 05:15
- Amount, such as 100.00
- 0
- Merchant
- Details
- Label ID
- Payment method ID
- Foreign currency amount
Labels contain the following fields:
- 3
- Label ID, any string that uniquely identifies the label
- Label name
- Label color: RGB values for the color, ranging from 0 to 1, separated by |, such as “0.5|0|0.5”
Payment methods contain the following fields:
- 4
- Payment method ID, any uniquely identifiable string
- Payment method name
- Currency: such as “CNY”
Comments
Comments are reviewed before they appear below the article.
No comments yet. Be the first to comment.